“DIY Vaping E-Liquids with Terpenes: A Step-by-Step UK Guide”
Table of Contents:
- Why DIY?
1.1. Advantages of controlling flavor and strength
1.2. Cost benefits
- Essential Equipment & Ingredients
2.1. PG, VG, nicotine bases (if desired)
2.2. Terpene concentrates, measuring tools
- Measuring and Mixing Safely
3.1. Recommended terpene dilution ratios
3.2 Avoiding overpowering flavors
- Steeping and Testing
4.1. How long to let e-liquids settle
4.2. Tasting and adjusting terpene levels
- Legal & Safety Reminders
5.1. Maximum nicotine strength in the UK
5.2. Childproof packaging and labeling
1 1. Why DIY?
Vaping has become a popular alternative to traditional smoking, offering a customizable and potentially less harmful experience. One of the most exciting aspects of vaping is the ability to create your own e-liquids. DIY vaping allows you to control the flavor, strength, and ingredients, ensuring a personalized experience. In this comprehensive guide, we’ll explore the world of DIY vaping e-liquids with terpenes, focusing on the UK market. We’ll cover the advantages of DIY, cost benefits, and provide a step-by-step guide to creating your own e-liquids.

1.1. Advantages of Controlling Flavor and Strength
One of the most significant advantages of DIY vaping is the ability to control the flavor and strength of your e-liquid. When you make your own e-liquids, you have complete control over the ingredients, allowing you to tailor the flavor to your exact preferences. Whether you prefer a fruity, minty, or dessert-like flavor, the possibilities are endless.
a. Customization
DIY vaping allows you to experiment with different flavor combinations. You can mix and match flavors to create unique blends that you won’t find in pre-made e-liquids. This level of customization is particularly appealing to those who enjoy trying new flavors and want to avoid the monotony of using the same e-liquid day after day.
b. Strength Control
Another advantage of DIY vaping is the ability to control the nicotine strength. Whether you’re looking to reduce your nicotine intake or prefer a stronger hit, DIY e-liquids allow you to adjust the nicotine levels to suit your needs. This is particularly beneficial for those who are using vaping as a tool to quit smoking, as you can gradually reduce the nicotine content over time.

1.2. Cost Benefits
In addition to the customization benefits, DIY vaping can also be more cost-effective than purchasing pre-made e-liquids. While there is an initial investment in equipment and ingredients, the long-term savings can be significant.
a. Initial Investment
When you first start DIY vaping, you’ll need to purchase some basic equipment and ingredients. This includes:
- Base Liquids: Propylene Glycol (PG) and Vegetable Glycerin (VG) are the primary base liquids used in e-liquids. These are relatively inexpensive and can be purchased in bulk.
- Nicotine: If you choose to include nicotine in your e-liquids, you’ll need to purchase a nicotine base. This can be bought in various strengths, allowing you to dilute it to your desired level.
- Flavor Concentrates: These are the ingredients that give your e-liquid its flavor. There are countless flavor concentrates available, ranging from single flavors to complex blends.
- Terpenes: Terpenes are aromatic compounds found in plants that can add unique flavors and aromas to your e-liquids. They are often used in cannabis-derived e-liquids but can be used in any e-liquid to enhance the flavor profile.
- Mixing Equipment: You’ll need some basic equipment to mix your e-liquids, including syringes, bottles, and a scale for measuring ingredients.
While the initial investment may seem daunting, the cost per milliliter of e-liquid is significantly lower than purchasing pre-made e-liquids. Over time, the savings can add up, making DIY vaping a cost-effective option.
b. Long-Term Savings
Once you have your initial setup, the ongoing cost of DIY vaping is relatively low. Base liquids, flavor concentrates, and terpenes are all relatively inexpensive, especially when purchased in bulk. Additionally, you can make large batches of e-liquid at once, further reducing the cost per milliliter.
For example, a 100ml bottle of pre-made e-liquid can cost anywhere from £10 to £20, depending on the brand and quality. In contrast, the cost of making 100ml of DIY e-liquid can be as low as £2 to £5, depending on the ingredients used. Over time, these savings can add up, making DIY vaping a more economical choice.
Now that we’ve covered the advantages of DIY vaping, let’s dive into the step-by-step process of creating your own e-liquids with terpenes.
Step 1: Gather Your Ingredients and Equipment
Before you start mixing, you’ll need to gather all the necessary ingredients and equipment. Here’s a list of what you’ll need:
- Base Liquids: PG and VG. These are the primary components of your e-liquid and make up the majority of the final product. PG is thinner and provides a stronger throat hit, while VG is thicker and produces more vapor. You can adjust the ratio of PG to VG depending on your preferences.
- Nicotine Base: If you choose to include nicotine, you’ll need a nicotine base. This is typically sold in strengths ranging from 18mg/ml to 72mg/ml. Be sure to handle nicotine with care, as it is a toxic substance.
- Flavor Concentrates: Choose your desired flavors. You can use single flavors or mix multiple flavors to create unique blends.
- Terpenes: Terpenes are optional but can add unique flavors and aromas to your e-liquid. They are often used in cannabis-derived e-liquids but can be used in any e-liquid to enhance the flavor profile.
- Mixing Equipment: You’ll need syringes or pipettes for measuring, empty bottles for storing your e-liquid, and a scale for accurate measurements.
Step 2: Calculate Your Recipe
Before you start mixing, it’s essential to calculate your recipe. This involves determining the amount of each ingredient you’ll need to achieve your desired flavor, strength, and PG/VG ratio.
a. PG/VG Ratio
The PG/VG ratio is a personal preference and can affect the throat hit, vapor production, and flavor intensity. Common ratios include:
- 50/50: Balanced throat hit and vapor production.
- 70/30 (VG/PG): More vapor production with a smoother throat hit.
- 30/70 (VG/PG): Stronger throat hit with less vapor production.
b. Nicotine Strength
If you’re including nicotine, you’ll need to calculate the amount of nicotine base to add to achieve your desired strength. For example, if you want to make 100ml of e-liquid with a nicotine strength of 6mg/ml and you’re using a 72mg/ml nicotine base, you’ll need to add approximately 8.33ml of nicotine base.
c. Flavor Concentrates
The amount of flavor concentrate you use will depend on the specific concentrate and your personal preference. Most flavor concentrates are used at a concentration of 5% to 20% of the total e-liquid volume. Be sure to check the recommended usage rate for each flavor concentrate.
d. Terpenes
If you’re using terpenes, they are typically used at a concentration of 1% to 5% of the total e-liquid volume. Terpenes are highly concentrated, so a little goes a long way.
Step 3: Mix Your Ingredients
Once you’ve calculated your recipe, it’s time to start mixing. Here’s a step-by-step guide to mixing your e-liquid:
a. Prepare Your Workspace: Ensure your workspace is clean and free from contaminants. Wear gloves to protect your skin from nicotine and other chemicals.
b. Measure Your Base Liquids: Using a syringe or scale, measure the required amount of PG and VG according to your recipe.
c. Add Nicotine: If you’re including nicotine, carefully measure the required amount of nicotine base and add it to your base liquids. Be sure to handle nicotine with care and avoid contact with your skin.
d. Add Flavor Concentrates: Measure the required amount of flavor concentrates and add them to your mixture. If you’re using multiple flavors, be sure to mix them thoroughly.
e. Add Terpenes: If you’re using terpenes, measure the required amount and add them to your mixture. Terpenes are highly concentrated, so be sure to use them sparingly.
f. Mix Thoroughly: Once all the ingredients are added, mix the e-liquid thoroughly. You can shake the bottle vigorously or use a magnetic stirrer to ensure the ingredients are well combined.
g. Steep Your E-Liquid: Steeping is the process of allowing your e-liquid to sit and mature, which can enhance the flavor. The steeping time can vary depending on the flavors used, but a general guideline is to steep for 1 to 2 weeks. During this time, shake the bottle daily to help the flavors blend.
Step 4: Test and Adjust
After steeping, it’s time to test your e-liquid. Fill your vaping device with the e-liquid and take a few puffs. Pay attention to the flavor, throat hit, and vapor production. If the flavor is too strong or too weak, you can adjust the amount of flavor concentrate in your recipe. If the throat hit is too harsh, you can adjust the PG/VG ratio or nicotine strength.
Step 5: Store Your E-Liquid
Once you’re satisfied with your e-liquid, it’s important to store it properly to maintain its quality. Store your e-liquid in a cool, dark place away from direct sunlight. Exposure to heat and light can degrade the ingredients and affect the flavor. Be sure to label your bottles with the date and recipe details for future reference.
While DIY vaping can be a fun and rewarding experience, it’s important to prioritize safety. Here are some safety considerations to keep in mind:
- Nicotine Handling: Nicotine is a toxic substance and should be handled with care. Always wear gloves when handling nicotine and avoid contact with your skin. Keep nicotine out of reach of children and pets.
- Proper Ventilation: When mixing e-liquids, ensure you’re working in a well-ventilated area to avoid inhaling any fumes.
- Accurate Measurements: Accurate measurements are crucial when mixing e-liquids. Use a scale or syringe to measure ingredients precisely.
- Labeling: Always label your e-liquid bottles with the ingredients and nicotine strength. This is important for safety and helps you keep track of your recipes.
2. Essential Equipment & Ingredients
2.1. PG, VG, nicotine bases (if desired)
Whether you’re looking to save money, experiment with unique flavors, or control the nicotine strength, DIY vaping is a rewarding and cost-effective alternative to pre-made e-liquids.
a. What Are PG and VG?
Propylene Glycol (PG) and Vegetable Glycerin (VG) are the two primary base liquids used in e-liquids. They form the foundation of your DIY e-liquid and determine its consistency, throat hit, and vapor production.
-
Propylene Glycol (PG):
PG is a thin, odorless liquid that carries flavor well and provides a stronger throat hit, similar to the sensation of smoking. It’s ideal for vapers who prefer a more intense flavor and a sharper throat hit. However, PG can cause dryness in the mouth and throat for some users. -
Vegetable Glycerin (VG):
VG is a thicker, sweeter liquid that produces dense vapor clouds. It’s smoother on the throat compared to PG, making it a popular choice for sub-ohm vaping and cloud chasers. However, VG can mute flavors slightly due to its sweetness.
b. Choosing the Right PG/VG Ratio
The PG/VG ratio you choose will depend on your vaping style and preferences. Common ratios include:
- 50/50: A balanced mix that works well for most devices, offering a good throat hit and decent vapor production.
- 70/30 (VG/PG): A higher VG ratio for smoother hits and larger vapor clouds, ideal for sub-ohm tanks and RDAs.
- 30/70 (VG/PG): A higher PG ratio for stronger throat hits and more pronounced flavors, suitable for mouth-to-lung (MTL) devices.
c. Where to Buy PG and VG in the UK
PG and VG are widely available in the UK from vaping suppliers, pharmacies, and online retailers.
d. Nicotine Bases (If Desired)
Nicotine is an optional ingredient in DIY e-liquids, but it’s essential for vapers who want to replicate the nicotine hit of traditional cigarettes. Nicotine bases are available in various strengths, typically ranging from 18mg/ml to 72mg/ml.
Here are types of nicotine bases:
- Freebase Nicotine: The most common form of nicotine used in e-liquids. It provides a stronger throat hit and is available in higher concentrations.
- Nicotine Salts: A smoother form of nicotine that is less harsh on the throat, even at higher concentrations. Nicotine salts are ideal for vapers who prefer high nicotine strengths without the harshness.
Nicotine is a toxic substance and should be handled with care. Always wear gloves when handling nicotine and work in a well-ventilated area. Store nicotine in a cool, dark place, away from children and pets.
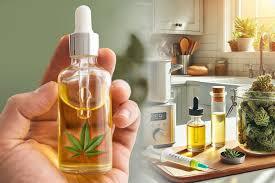
2.2. Terpene Concentrates
Terpenes are aromatic compounds found in plants, including cannabis, fruits, and herbs. They are responsible for the distinctive flavors and aromas of many plants and are increasingly used in e-liquids to enhance flavor profiles. Terpenes can add depth and complexity to your DIY e-liquids, making them a popular choice for vapers who want to create unique blends.
a. Benefits of Using Terpenes in E-Liquids
- Enhanced Flavor: Terpenes can add natural, authentic flavors to your e-liquids, such as citrus, pine, or floral notes.
- Aromatherapy Benefits: Some terpenes, like limonene (found in citrus fruits) and linalool (found in lavender), are believed to have calming or uplifting effects.
- Customization: Terpenes allow you to create e-liquids with unique flavor profiles that are not available in pre-made options.
b. Popular Terpenes for DIY E-Liquids
- Limonene: A citrusy terpene found in lemons and oranges, known for its uplifting properties.
- Myrcene: A earthy, musky terpene found in mangoes and hops, often used for its relaxing effects.
- Pinene: A piney terpene found in pine needles and rosemary, known for its refreshing aroma.
- Linalool: A floral terpene found in lavender, often used for its calming effects.
c. How to Use Terpenes in DIY E-Liquids
Terpenes are highly concentrated, so they should be used sparingly. A typical concentration is 1% to 5% of the total e-liquid volume. Start with a small amount and adjust to taste.
Terpenes can be purchased from specialized vaping suppliers and online retailers.
Accurate measurements are crucial for creating consistent and high-quality DIY e-liquids. Using the right tools ensures that your e-liquids have the correct flavor, nicotine strength, and PG/VG ratio.
· Digital Scale:
A precision digital scale is one of the most important tools for DIY vaping. It allows you to measure ingredients by weight, which is more accurate than measuring by volume. Look for a scale that measures to at least two decimal places (0.01g).
· Syringes and Pipettes:
Syringes and pipettes are useful for measuring small amounts of liquid, such as nicotine or flavor concentrates. They are especially helpful for beginners who are still getting familiar with DIY mixing.
· Measuring Cylinders:
Measuring cylinders are ideal for measuring larger volumes of base liquids (PG and VG). They are typically made of glass or plastic and come in various sizes.
· Empty Bottles:
You’ll need bottles to store your finished e-liquids. Glass or plastic bottles with childproof caps are ideal. Consider using amber or cobalt glass bottles to protect your e-liquid from light.
· Funnels:
Funnels make it easier to transfer liquids into bottles without spills. They are especially useful when working with thick VG.
3 3. Measuring and Mixing Safely
DIY vaping is an exciting and rewarding hobby that allows you to create custom e-liquids tailored to your preferences. However, to ensure a safe and enjoyable experience, it’s crucial to measure and mix your ingredients accurately. This is especially important when working with potent ingredients like terpenes and flavor concentrates, which can easily overpower your e-liquid if not used correctly.
3.1. Recommended terpene dilution ratios
Using too much terpene concentrate can result in an unpleasant vaping experience, with flavors that are too strong or even harsh on the throat. Proper dilution ensures that the terpenes enhance your e-liquid without overpowering it.
The ideal dilution ratio for terpenes depends on the specific terpene and your personal preferences. However, a general guideline is to use terpenes at a concentration of 1% to 5% of the total e-liquid volume. Here’s a breakdown of how to calculate and use terpenes safely:
· 1% Terpene Concentration:
For a subtle flavor enhancement, use 1% terpenes. This is ideal for vapers who want a hint of flavor without it dominating the e-liquid.
Example: For 100ml of e-liquid, use 1ml of terpenes.
· 2% to 3% Terpene Concentration:
For a more pronounced flavor, use 2% to 3% terpenes. This is a good starting point for most DIY vapers.
Example: For 100ml of e-liquid, use 2ml to 3ml of terpenes.
· 5% Terpene Concentration:
For a strong, bold flavor, use up to 5% terpenes. This is the maximum recommended concentration and should be used sparingly.
Example: For 100ml of e-liquid, use 5ml of terpenes.
Here are tips for diluting terpenes:
· Start Low and Go Slow: Begin with a lower concentration (1% to 2%) and gradually increase if needed. It’s easier to add more terpenes than to fix an overpowered e-liquid.
· Mix Thoroughly: Ensure the terpenes are evenly distributed in your e-liquid by shaking the bottle vigorously or using a magnetic stirrer.
· Steep Your E-Liquid: Allow your e-liquid to steep for a few days to let the flavors blend and mellow.
3.2 Avoiding overpowering flavors
One of the biggest challenges in DIY vaping is achieving the right balance of flavors. Using too much flavor concentrate or terpenes can result in an e-liquid that is overwhelming or unpleasant to vape. Here are some tips to help you avoid overpowering flavors:
a. Start with Small Batches
When experimenting with new flavors or recipes, start with small batches (10ml to 30ml). This allows you to test the flavor without wasting ingredients. If the flavor is too strong, you can dilute it with more base liquid (PG/VG).
b. Use Flavor Concentrates Sparingly
Flavor concentrates are highly potent, so a little goes a long way. Most flavor concentrates are used at a concentration of 5% to 20% of the total e-liquid volume. Here’s a general guideline:
-
Single Flavors: Use 5% to 10% flavor concentrate.
Example: For 100ml of e-liquid, use 5ml to 10ml of flavor concentrate. -
Complex Blends: Use 10% to 20% flavor concentrate.
Example: For 100ml of e-liquid, use 10ml to 20ml of flavor concentrate.
c. Mix Flavors Thoughtfully
When combining multiple flavors, consider how they will interact. Some flavors complement each other, while others may clash. Here are some tips for mixing flavors:
- Start with a Base Flavor: Choose a primary flavor (e.g., strawberry) and build around it.
- Add Supporting Flavors: Use secondary flavors (e.g., cream or menthol) to enhance the base flavor.
- Use Accent Flavors: Add a small amount of accent flavors (e.g., citrus or spice) for complexity.
d. Test and Adjust
After mixing your e-liquid, test it by vaping a small amount. Pay attention to the flavor intensity and balance. If the flavor is too strong, dilute it with more base liquid. If it’s too weak, add a small amount of flavor concentrate and mix thoroughly.
4. Steeping and Testing
Creating your own DIY e-liquids is an art that combines science, creativity, and patience. Once you’ve mixed your ingredients, the next crucial steps are steeping and testing. Steeping allows the flavors to meld and mature, while testing ensures your e-liquid is balanced and enjoyable.
4.1. How long to let e-liquids settle
a. What Is Steeping?
Steeping is the process of allowing your e-liquid to sit and mature over time. During this period, the flavors blend together, and any harsh or chemical notes mellow out. Steeping is especially important for complex flavor profiles and e-liquids containing terpenes, as it enhances the overall vaping experience.
b. Why Steep Your E-Liquid?
· Flavor Development: Steeping allows the flavors to fully develop and harmonize.
· Smoother Vape: Harsh or chemical notes often mellow out during steeping.
· Improved Consistency: Steeping ensures that the ingredients are evenly distributed.
c. How Long Should You Steep Your E-Liquid?
The steeping time depends on the ingredients and flavor profile of your e-liquid. Here’s a general guideline:
· Fruit-Based E-Liquids:
Fruit flavors tend to steep quickly and often require 1 to 3 days. However, some complex fruit blends may benefit from up to 1 week.
· Dessert and Cream-Based E-Liquids:
Dessert and cream flavors take longer to steep due to their complexity. Allow 1 to 2 weeks for these e-liquids to mature.
· Tobacco and Spice-Based E-Liquids:
Tobacco and spice flavors often require the longest steeping time. Aim for 2 to 4 weeks for optimal flavor development.
· Terpene-Enhanced E-Liquids:
Terpenes are highly aromatic and can benefit from steeping to blend seamlessly with other flavors. Steep terpene-enhanced e-liquids for 3 to 7 days.
d. Steeping Methods
There are several methods for steeping e-liquids. Choose the one that works best for you:
· Natural Steeping:
Simply store your e-liquid in a cool, dark place and let it sit for the recommended time. Shake the bottle daily to help the flavors blend.
· Warm Water Bath:
Place the bottle of e-liquid in a bowl of warm water (not hot) for a few hours. This can speed up the steeping process by thinning the liquid and encouraging the flavors to mix.
· Ultrasonic Cleaner:
An ultrasonic cleaner uses sound waves to mix the ingredients quickly. This method can reduce steeping time to just a few hours.
e. Tips for Effective Steeping
· Use Amber or Cobalt Glass Bottles: These bottles protect your e-liquid from light, which can degrade the flavors.
· Label Your Bottles: Include the date and recipe details to track the steeping time.
· Be Patient: While it’s tempting to vape your e-liquid right away, patience pays off with a smoother, more flavorful vape.
4.2. Tasting and adjusting terpene levels
a. The Role of Terpenes in E-Liquids
Terpenes are aromatic compounds found in plants that add unique flavors and aromas to e-liquids. They are highly concentrated, so even a small amount can significantly impact the flavor profile. However, using too much can result in an overpowering or harsh vape.
b. How to Taste Your E-Liquid
Tasting your e-liquid is an essential step in the DIY process. Here’s how to do it effectively:
- Shake the Bottle: Before tasting, shake the bottle thoroughly to ensure the ingredients are well mixed.
- Test in a Clean Device: Use a clean tank or RDA to avoid contamination from previous flavors.
- Start with Small Puffs: Take small puffs to assess the flavor without overwhelming your palate.
- Pay Attention to Flavor Notes: Note the intensity of the flavors, the balance, and any harsh or off-notes.
c. Adjusting Terpene Levels
If your e-liquid tastes too strong or unbalanced, you can adjust the terpene levels. Here’s how:
· Dilute with Base Liquid:
If the terpenes are overpowering, add more base liquid (PG/VG) to dilute the flavor. Start with small amounts (1ml to 2ml) and test again.
· Add More Flavor Concentrate:
If the terpenes are too subtle, add a small amount of flavor concentrate to enhance the overall flavor. Be cautious not to overdo it.
· Balance with Other Flavors:
If the terpenes are clashing with other flavors, try adding a complementary flavor to balance the profile. For example, if the terpenes are too citrusy, add a creamy or sweet flavor to mellow it out.
· Let It Steep Longer:
If the flavors are not blending well, allow the e-liquid to steep for a few more days. This can help the terpenes integrate with the other ingredients.
d. Recommended Terpene Levels
As a general rule, terpenes should make up 1% to 5% of the total e-liquid volume. Here’s a breakdown:
- 1% Terpenes: Subtle flavor enhancement.
- 2% to 3% Terpenes: Balanced flavor profile.
- 5% Terpenes: Strong, bold flavor (use sparingly).
5. Legal & Safety Reminders
DIY vaping is a rewarding and cost-effective way to create custom e-liquids tailored to your preferences. However, it’s essential to be aware of the legal and safety guidelines that govern vaping in the UK. These regulations are designed to protect consumers and ensure that vaping products are safe and of high quality.
5.1. Maximum nicotine strength in the UK
a. Understanding Nicotine Regulations
Nicotine is a highly regulated substance in the UK due to its potential health risks and addictive nature. The UK has implemented strict guidelines to ensure that nicotine-containing products, including e-liquids, are safe for consumers.
b. Maximum Nicotine Strength
According to the Tobacco and Related Products Regulations (TRPR) 2016, the maximum nicotine strength allowed in e-liquids in the UK is 20mg/ml (or 2%). This regulation applies to both pre-made e-liquids and DIY nicotine bases.
· Why 20mg/ml?
The 20mg/ml limit is based on research and recommendations from public health experts. It strikes a balance between providing enough nicotine for smokers looking to quit and minimizing the risk of nicotine poisoning, especially for inexperienced users.
c. Safety Tips for Handling Nicotine
Nicotine is a toxic substance and should be handled with care. Here are some safety tips:
· Wear Gloves: Always wear gloves when handling nicotine to avoid skin contact.
· Work in a Well-Ventilated Area: Ensure your workspace is well-ventilated to avoid inhaling nicotine fumes.
· Store Nicotine Safely: Keep nicotine in a cool, dark place, away from children and pets.
· Use Childproof Bottles: Store nicotine in childproof containers to prevent accidental ingestion.
5.2. Childproof packaging and labeling
a. The Importance of Childproof Packaging
Childproof packaging is a legal requirement for all nicotine-containing products in the UK, including e-liquids and nicotine bases. This regulation is designed to prevent accidental ingestion by children, which can lead to nicotine poisoning.
b. What Is Childproof Packaging?
Childproof packaging is designed to be difficult for children to open but easy for adults to use. Common types of childproof packaging include:
- Childproof Caps: Bottles with caps that require a specific action (e.g., pressing and twisting) to open.
- Tamper-Evident Seals: Seals that show if the packaging has been opened or tampered with.
c. Legal Requirements for Childproof Packaging
Under the Tobacco and Related Products Regulations (TRPR) 2016, all e-liquids and nicotine-containing products must be sold in childproof packaging. This applies to both pre-made e-liquids and DIY supplies, including nicotine bases and flavor concentrates.
d. Labeling Requirements
In addition to childproof packaging, e-liquids and nicotine-containing products must be properly labeled. The labeling requirements are designed to provide consumers with essential information about the product and ensure its safe use.
e. Required Information on Labels
The following information must be included on the labels of e-liquids and nicotine-containing products:
- Product Name: The name of the e-liquid or nicotine base.
- Nicotine Content: The nicotine strength in mg/ml.
- Ingredients List: A list of all ingredients, including PG, VG, flavorings, and nicotine.
- Health Warning: A warning stating, “This product contains nicotine, which is a highly addictive substance.”
- Batch Number: A unique identifier for the batch of the product.
- Expiry Date: The date by which the product should be used.
- Volume: The total volume of the product in milliliters.
- Manufacturer’s Details: The name and contact information of the manufacturer or importer.
f. Example of a Compliant Label
Product Name: Strawberry E-Liquid
Nicotine Content: 6mg/ml
Ingredients: Propylene Glycol, Vegetable Glycerin, Flavorings, Nicotine
Health Warning: This product contains nicotine, which is a highly addictive substance.
Batch Number: 12345
Expiry Date: 12/2025
Volume: 100ml
Manufacturer: VapeCo UK
g. Tips for DIY Vapers
If you’re making your own e-liquids, it’s essential to follow these labeling and packaging guidelines to ensure safety and compliance. Here’s how:
- Use Childproof Bottles: Store your e-liquids and nicotine bases in childproof bottles.
- Label Your Bottles: Clearly label all bottles with the required information, including the nicotine strength, ingredients, and health warning.
- Keep Records: Document your recipes and batch numbers for easy reference.
- Store Safely: Keep your e-liquids and nicotine bases out of reach of children and pets.
Conclusion:
DIY vaping e-liquids with terpenes is a rewarding and cost-effective way to customize your vaping experience. By controlling the ingredients and flavors, you can create unique blends that suit your preferences perfectly. However, it’s essential to approach DIY e-liquids with caution, especially when working with potent ingredients like terpenes and nicotine.
Start small, measure carefully, and always prioritize safety. With practice, you’ll develop the skills and knowledge to craft e-liquids that rival even the most premium commercial options. Happy mixing!

Here you can find vapes available in UK.
References:
- Public Health England. (2018). "Evidence Review of E-Cigarettes and Heated Tobacco Products."
- Tobacco and Related Products Regulations 2016. UK Government.
- National Institute for Health and Care Excellence (NICE). (2021). "Nicotine and E-Cigarettes: A Guide for Healthcare Professionals."
- Farsalinos, K. E., & Polosa, R. (2014). "Safety evaluation and risk assessment of electronic cigarettes as tobacco cigarette substitutes." International Journal of Environmental Research and Public Health.


